With so much content competing for attention on the Internet, do you ever wonder if you start a blog if your content stands a chance?
According to the journal Science, we have to process five times more information today than in 1986.
Our readers are overwhelmed. You probably are too.
So how can you make your next blog post stand out among the masses? Is the attempt even worth the effort?
You bet it is. And it’s easier than you think.
Visitors to your website read, on average, only 28% of what’s in front of them. So slowing them down long enough to take in your message is imperative.
And one way to slow them down, increase engagement – and boost comprehension – is to use visuals.
(Yes, I know you’re not an artist. Stick with me.)
The following are six types of gorgeous visuals that are easy to create and can double your blog’s traffic and engagement levels:
1. The Highly Shareable Image
See this image?

It’s just begging for shares on Pinterest, Facebook, and even Twitter because:
- It’s versatile, and works beautifully on a wide variety of social media platforms.
- It serves as an “advertisement” for your post content, enticing people to click through to learn more.
- It’s the easiest of all to create (you’ll see).
So how do you create an image that people will love to share?
Start by finding an image that reflects your post content. (Get my 12 Days of Visual Buzz series for more information on sourcing great images). Don’t choose an image that’s too busy; look for blank areas where you can fit some text. Or, create a translucent panel with one of the tools below, and position your text on top of it.
Then add the post headline to the graphic. To do this easily, use one of the following online image editors:
- PicMonkey.com: free with a paid Pro version
- iPiccy.com: free, ad supported
- Pixlr.com: free, ad supported
And make sure your text is large enough that it’s still readable when your image gets reduced to a preview size on social media platforms.
Include the name of your site somewhere in the image too, just in case it gets separated from the link back to your post.
If you’re using WordPress for your blog, set it as your Featured Image so social media share buttons can pick it up – and make a point of asking readers to share your post.
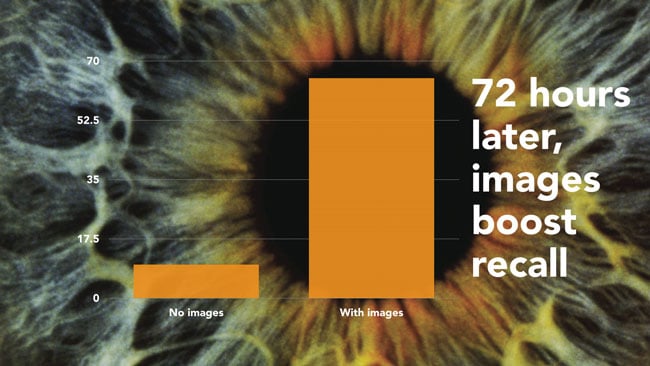
2. The Data-Driven Graphic
– John Medina, Brain Rules

Others may refer to data-driven graphics as infographics. But let’s avoid that term here so we’re not boxed in by what we assume an infographic should look like.
Think about it this way instead – sometimes you need to communicate data. Instead of quoting statistics or using a plain table, turning your data into a graphic is much more powerful.
Present your data in a form that makes it beautiful and engaging. And add layers of meaning by choosing photos or textures that communicate your message.
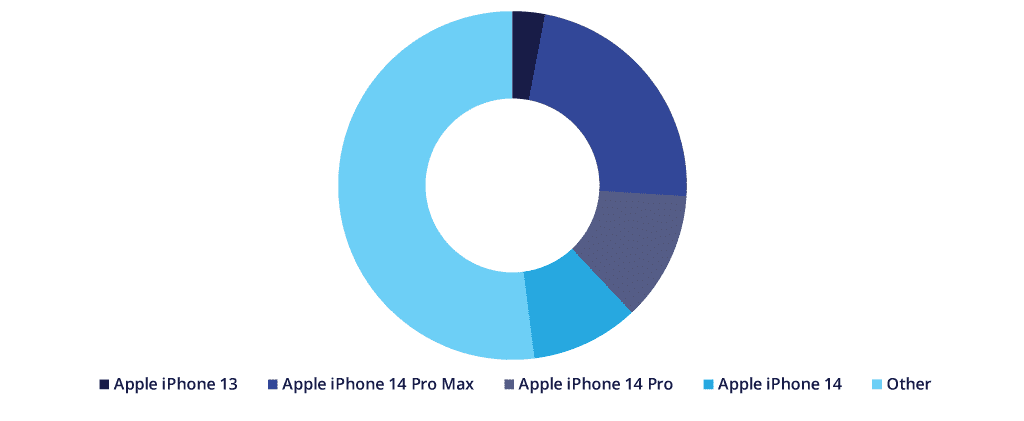
Take a look at the chart below from an article about Apple sales, for example. It quickly encapsulates the dominance of iPhones over other smartphones in the US market, and that is without using a lot of text.

You can easily create such data-driven visuals (without a design degree) with the following resources:
- Simple Diagrams is an inexpensive software program you install on your computer. It’s cross-platform compatible and creates graphics that look hand-drawn and accessible. It’s like artistic talent in a box!
- Easel.ly creates simple data-driven graphics using a series of visual themes you can easily modify. You’ll get great online help, and professional results. It’s in beta, and it’s free.
- Infogr.am helps you make your own simple infographics: no design skills needed. You must register to use it.
You may already have tools to create charts and other data-driven visuals on your computer – they’re built in to PowerPoint and Keynote.
What kind of data can you share with your readers? Try the following ideas:
- Make a graph of the most popular (or most commented on) posts of the past six months.
- Conduct a reader survey and share the results in an attractive pie chart.
- Create a graph that shows the most-popular topics your blog covers, in order of frequency – it’s a quick way to explain what your blog is about.
Just remember: you can create this kind of visual when the data itself is dry and you want to add a layer of meaning to keep it interesting.
3. The Behind-The-Scenes Photo
No, I’m not recommending you start filling your blog with selfies.
But asking a friend or family member to take a photo of you working on your blog isn’t a bad place to start. And if you occasionally work in some interesting places (a café, on the beach, or near natural beauty of any kind), consider showing this to your readers too.

Behind-the-scenes images build intimacy and put a human face on your blog. If you have team members, share photos of your meetings and your work environment.
Use the resources mentioned in the first section to add text to your photos if you’d like. And spread them around – they work on your blog’s About page, within posts, and in your email marketing. They’re also effective on Instagram, Pinterest, Facebook, Google+ and even Twitter.
4. The 3D Packaging Shot
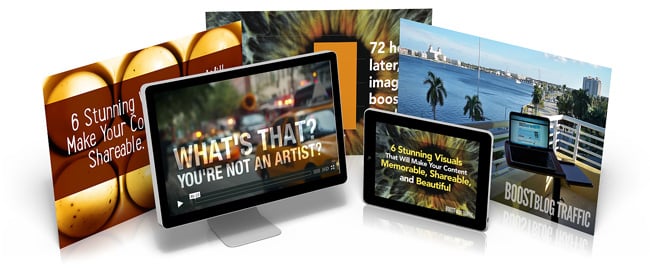
If you offer information online – ebooks, products, and even consulting services – an attractive 3D image helps your prospects visualize what they’ll get when they sign up, register, or purchase.

3D images make digital products seem more real and tangible. You can
- Use them right inside a blog post to show a downloadable item you’re giving away.
- Build anticipation with a peek at an upcoming product.
- Establish value by adding all the elements of an online product together in one composite image, as you see above.
A successful 3D image shows your digital product in the best possible light. Marketers call it a hero shot for good reason: it makes your product look epic.
My favorite resources for creating great-looking 3D product images are:
- BoxShot: A heavy-duty solution that gives you control over placement, lighting, and camera angles. Pricy, but if you plan to use it more than a few times, it will pay for itself.
- MyEcoverMaker: Strictly for book covers, this inexpensive option allows you to design your cover and create the 3D version all in one shot.
- BoxShotKing: No software to download; it’s all online. You can create a variety of cover designs and convert them to 3D versions right on the site. Download them and place them on your opt-in forms, sales pages, and in your sidebar ads. Available by subscription.
Even if you don’t have a product or service to sell (yet), use 3D images when you’re asking for anything – for example, an email address – in exchange for your ebooks, white papers, and videos. They make these “freebies” more desirable by bringing them to life.
5. The Do-It-Yourself Video
Adding video to your blog posts brings the information you share to life, gives you a way to introduce your readers to interesting people, and allows you to demonstrate techniques you’d otherwise struggle to describe with words.
You have a lot of options here, none of which involve standing alone in front of a camera:
- Combine photos, text, and music using Animoto for a fast-paced video that gets your message across (I used it for the video above).
- Record Skype interviews (with or without you making an appearance on-screen) with Pamela for Windows, or eCamm’s Call Recorder for Mac.
- Or keep it simple with a tool you may already have; Powerpoint and Keynote presentation software both allow you to talk over slides and record a video you can easily upload to your blog as I did here.
So what are the most effective ways to use video on your blog?
- You can drop videos onto any landing pages where you want visitors to opt-in to your email list. A quick video describes your blog – and what they’ll get from subscribing – will motivate them to sign up.
- You can also sell products and make money from your website with on-screen walk-throughs of you or your affiliate products or services. Show how existing customers use your offerings, and the results they could get.
- You can interview happy customers and incorporate their testimonials in a video.
And remember, don’t just post these videos on your YouTube channel: Facebook, Twitter, Google+ and Pinterest can all share videos now.
Successful videos are short and to the point – video viewers are an impatient bunch, so keep it moving and you’ll keep them engaged. As a rule of thumb, try to keep promotional videos less than one minute. A product walk-through or how-to may need a little longer, but try not to exceed three minutes.
6. The Slick Slide Deck
When you have a lot of information to convey, and you’d like to give readers a takeaway they can download and review later, consider creating a slide deck.
They’re an easy way to reinforce your key messages, and they add an extra layer of interest to your post.
SlideShare is owned by LinkedIn, and if your readers fit the LinkedIn demographic, SlideShare is a great way to reach them.
You can embed a SlideShare presentation in your blog post and on your LinkedIn profile like I’ve done above.
You can share your deck to all the major social media platforms. And SlideShare is a content platform in its own right, so people can discover your content without even knowing about your blog. If you’re really lucky, your presentation may be featured on the SlideShare home page, like this one was.
Slide decks are also easy to create with tools you may already have:
- PowerPoint and Keynote both feature a wide range of visual templates.
- OpenOffice Presentation is a free, open-source slide creator tool.
- Haiku Deck helps you create simple, beautiful slides with its web and tablet-based apps.
The prevailing wisdom from the PowerPoint pros is to use the minimal amount of text on slides. But if you plan to embed your slide deck on SlideShare, it must have enough detail to stand alone, so don’t be afraid to set up your slides so they tell a story all by themselves.
When are slides the most effective option for a blogger?
- List posts lend themselves perfectly to slide decks.
- Posts that explain a process step-by-step are also a good match.
- FAQ-type posts work well too.
Any information-dense post that you consider to be foundational information your readers need in order to interact with your products and services is also a good candidate.
It’s Time to Get Visual with Your Blog
If you’re feeling a bit overwhelmed by all the options, I have a suggestion.
Stop thinking about these visuals as art, and start thinking about them as visual communication.
Researchers at 3M concluded that humans process visuals 60,000 times faster than text. Communicating with visuals is like sending your information on a rocket straight to your reader’s brain.
Start with something easy. What’s the easiest image to create on the list above?
It’s a toss-up between #4, The Behind-The-Scenes Photo (which you may already have), and #1, the Highly Shareable Image.
Learning to communicate visually is no different than learning anything else for the first time: it gets easier the more you do.
So choose one of the easy-to-create image types, and commit to adding it to your blog post this week.


